In part 3 of this tutorial, you'll learn how to set up your FTP Server including how to use encryption.
You've assigned a static ip address, forwarded the ports on your router and you've installed the Filezilla server. Now it's time to configure Filezilla.
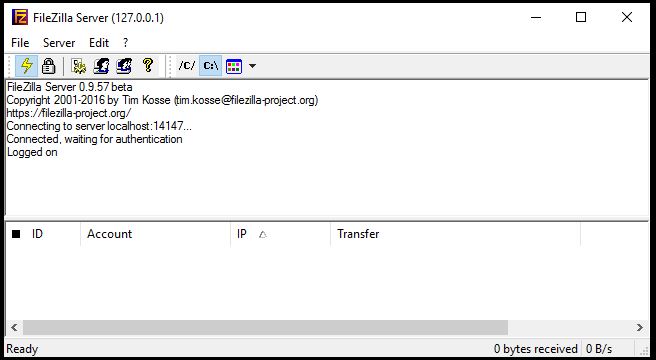
- Start Filezilla Server: an interface window will open and will look similar to this. In the logging pane, you'll see that it's connected to your localhost on port 14147 (Filezilla Server default port for the administrator) and it should say that you are logged on.
- In the menu bar click on edit and choose settings

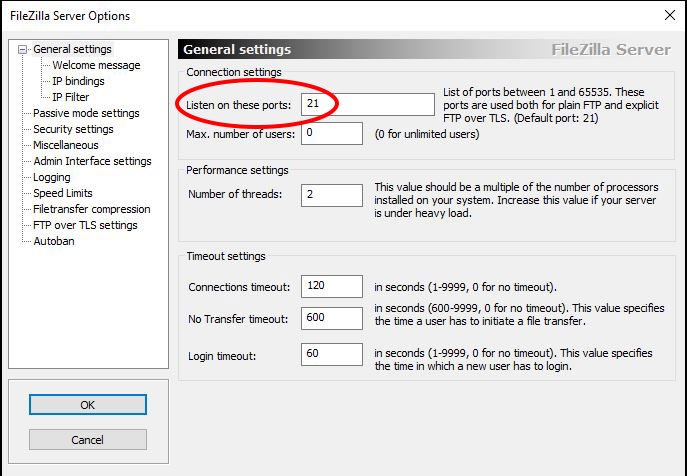
- In the general settings pane, tell Filezilla Server to listen on port 21 (port 21 is FTP programs default port)
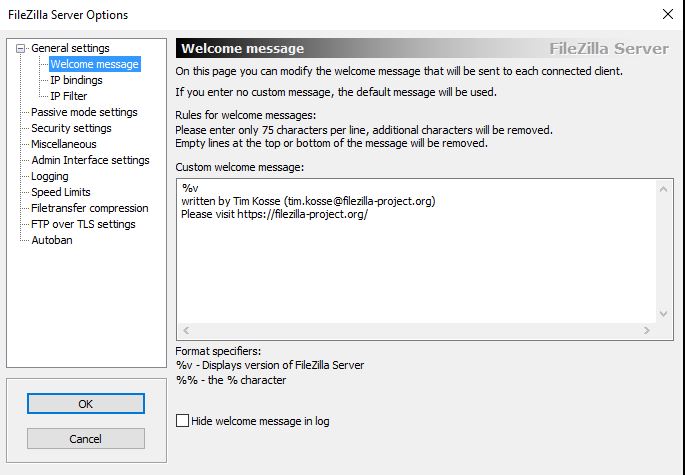
If you want to customize the welcome message, you can do so in the Welcome Message pane
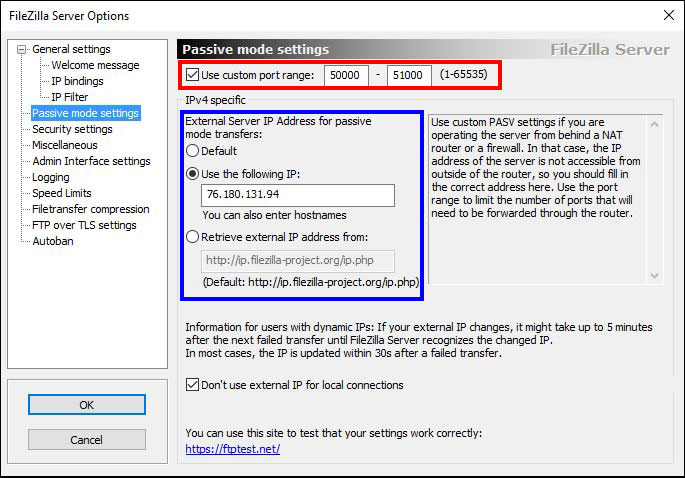
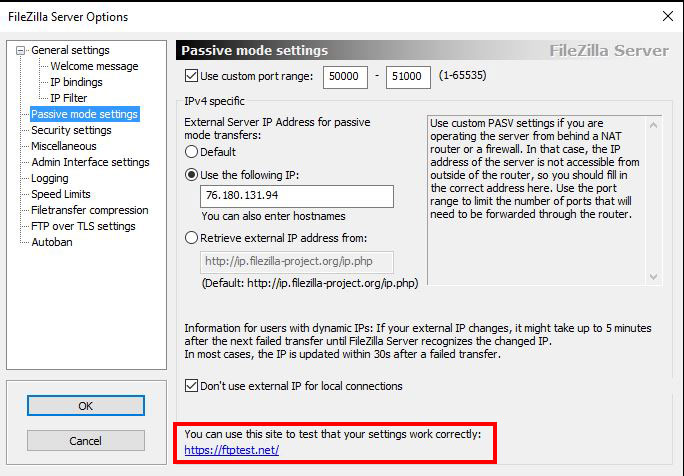
- In the Passive mode pane check the "Use custom port range" check box and enter the range of ports that you set in your routers "Port Range Forward" (steps 16-18 in part 1). In the IPv4 Specific area, make sure you enter your routers outside ip address (your public address). You can find at http://www.whatsmyip.org/ or many other websites. You may also try to retrieve if from the filezilla project by selecting the thirid radio button. I've not tried this option so your on your own if you choose that option. Also, make sure you check "Don't use external IP for local connections"
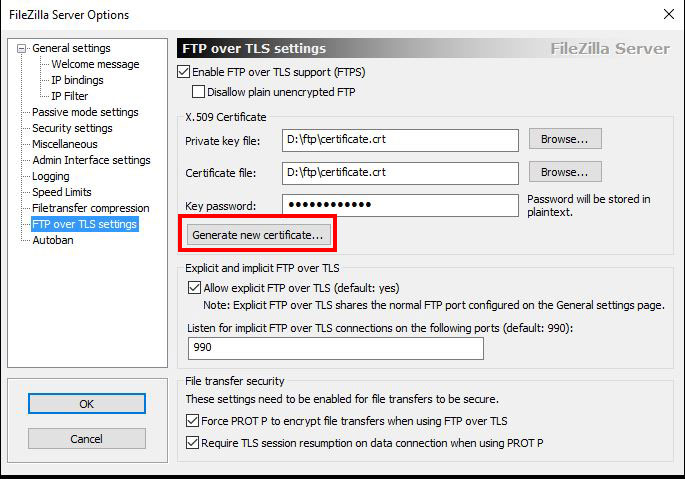
- If you want to transfer files securely (which you should) click on the "FTP over TLS settings pane. First, check the Enable FTP over TLS support checkbox.
Next, you'll need a certificate. But, before you generate and fill in the form I'd suggest that you decide where you'll want to store the key. As you can see I'm storing my key in a folder called ftp. Once you've decided where you'll store the key, navigate to that folder and create a blank document with an extension of .crt. Now you the Generate a new Certificate by clicking on the button.
Choose a key size. The smaller the key the faster transfers can happen, however with todays bandwidth speeds you should be able to choose a 2048 bit key with no problems. Go a head and fill in the form as accurately as you can, then click the browse button and select the blank file you created in the previous step. Finally, click on the Generate certificate button.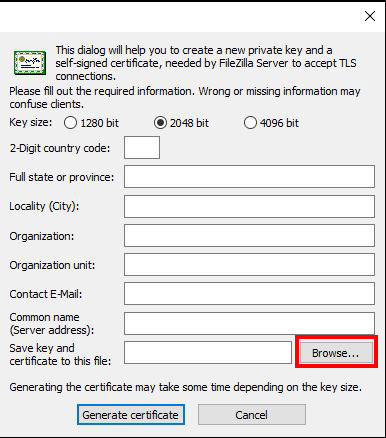
- To test if all your settings are correct and that your FTP server can be reached from outside your local area network (LAN) go back to the Passive mode settings pane and click on the link at the bottom. If your settings are correct you'll get a success message. If there are errors, the website will let you know, (but it may not tell you how to fix it, but that's what the internet is for).
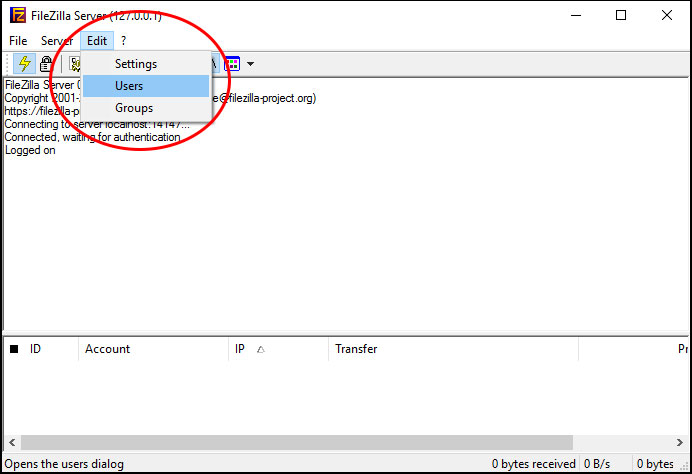
- You'll need to add users. In the menu bar click on edit and choose users.
- On the General settings page in the right hand pane, click the Add button.
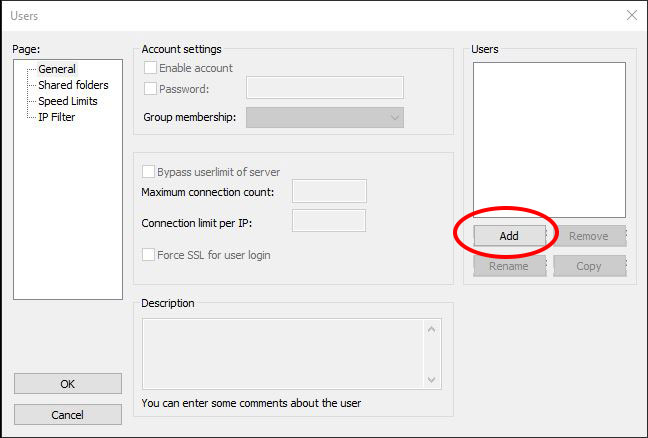
- Enter a user name in the Add user account dialog box then click ok.
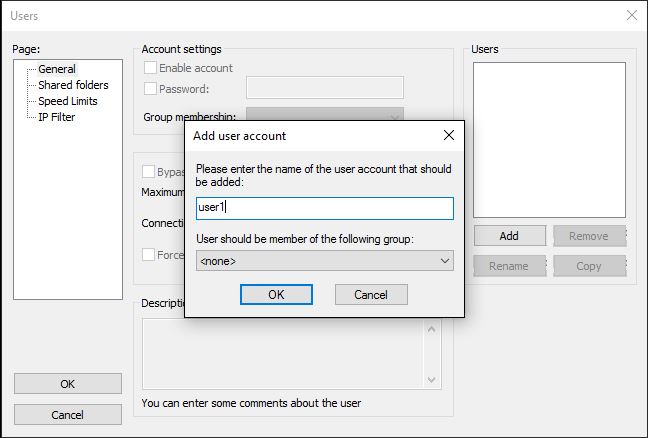
In the Account settings pane check the "Enable account" and the password checkboxes. Enter a password for this user. Check the "Force SSL for user login" checkbox.<img alt="screenshot" of="" filezilla="" server="" account="" settings="" dialog="" box"="" data-cke-saved-src="/sites/default/files/images/articles/set-up-ftp-server-pt-3-image-11.jpg" src="/sites/default/files/images/articles/set-up-ftp-server-pt-3-image-11.jpg" style="width: 100%;">
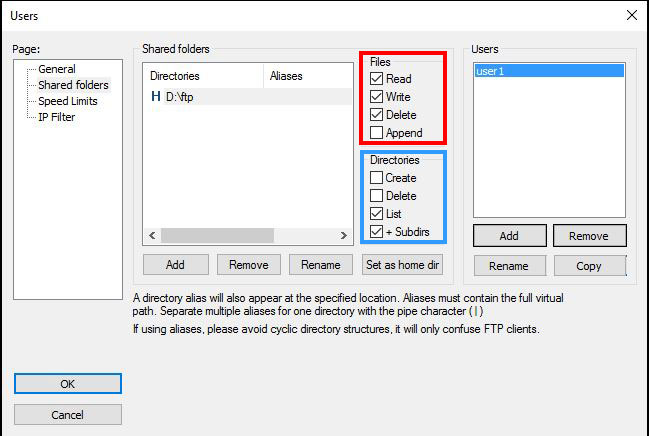
- If you haven't don so yet, make a folder on your hard drive where the users will store their files. For example, D:\ftp. In the Shared folders pane, click on the Add button, choose a folder and click ok.
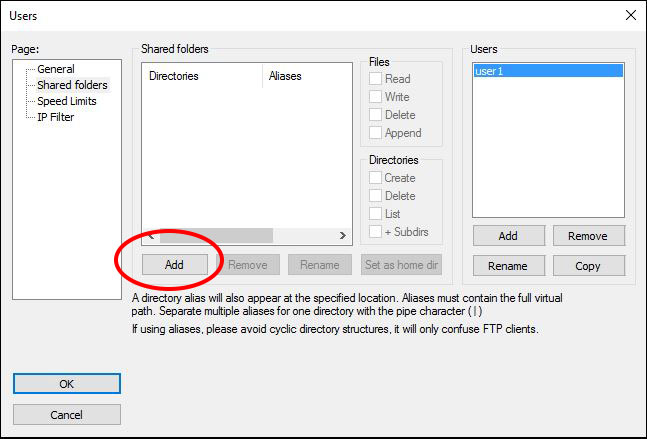
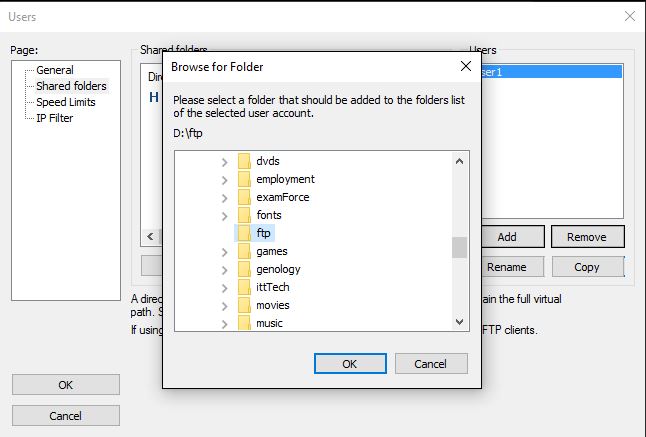
- Tic the file and directories permissions you need and click ok.
Your all done, however, I'd recommend that you check out these websites pertaining to groups, users and aliases blog.thecherneys.com and/or Scribblings of a TechnoBuff
References:
Filezilla
blog.thecherneys.com
Scribblings of a TechnoBuff

